Accounting: Importing Customers from your Accounting Platform
You can easily import your existing customers and contacts from your accounting platform into RoasterTools. You will need to review the data to ensure it's accuracy and completeness.
Overview
Note: this article is for Quickbooks Online accounting connections that were connected after January 1 2026, and all Xero or Quickbooks Desktop connections.
For Quickbooks Online connections that were created earlier than 2026, please see this help doc for uploading a CSV of customers.
Steps to Import Customers
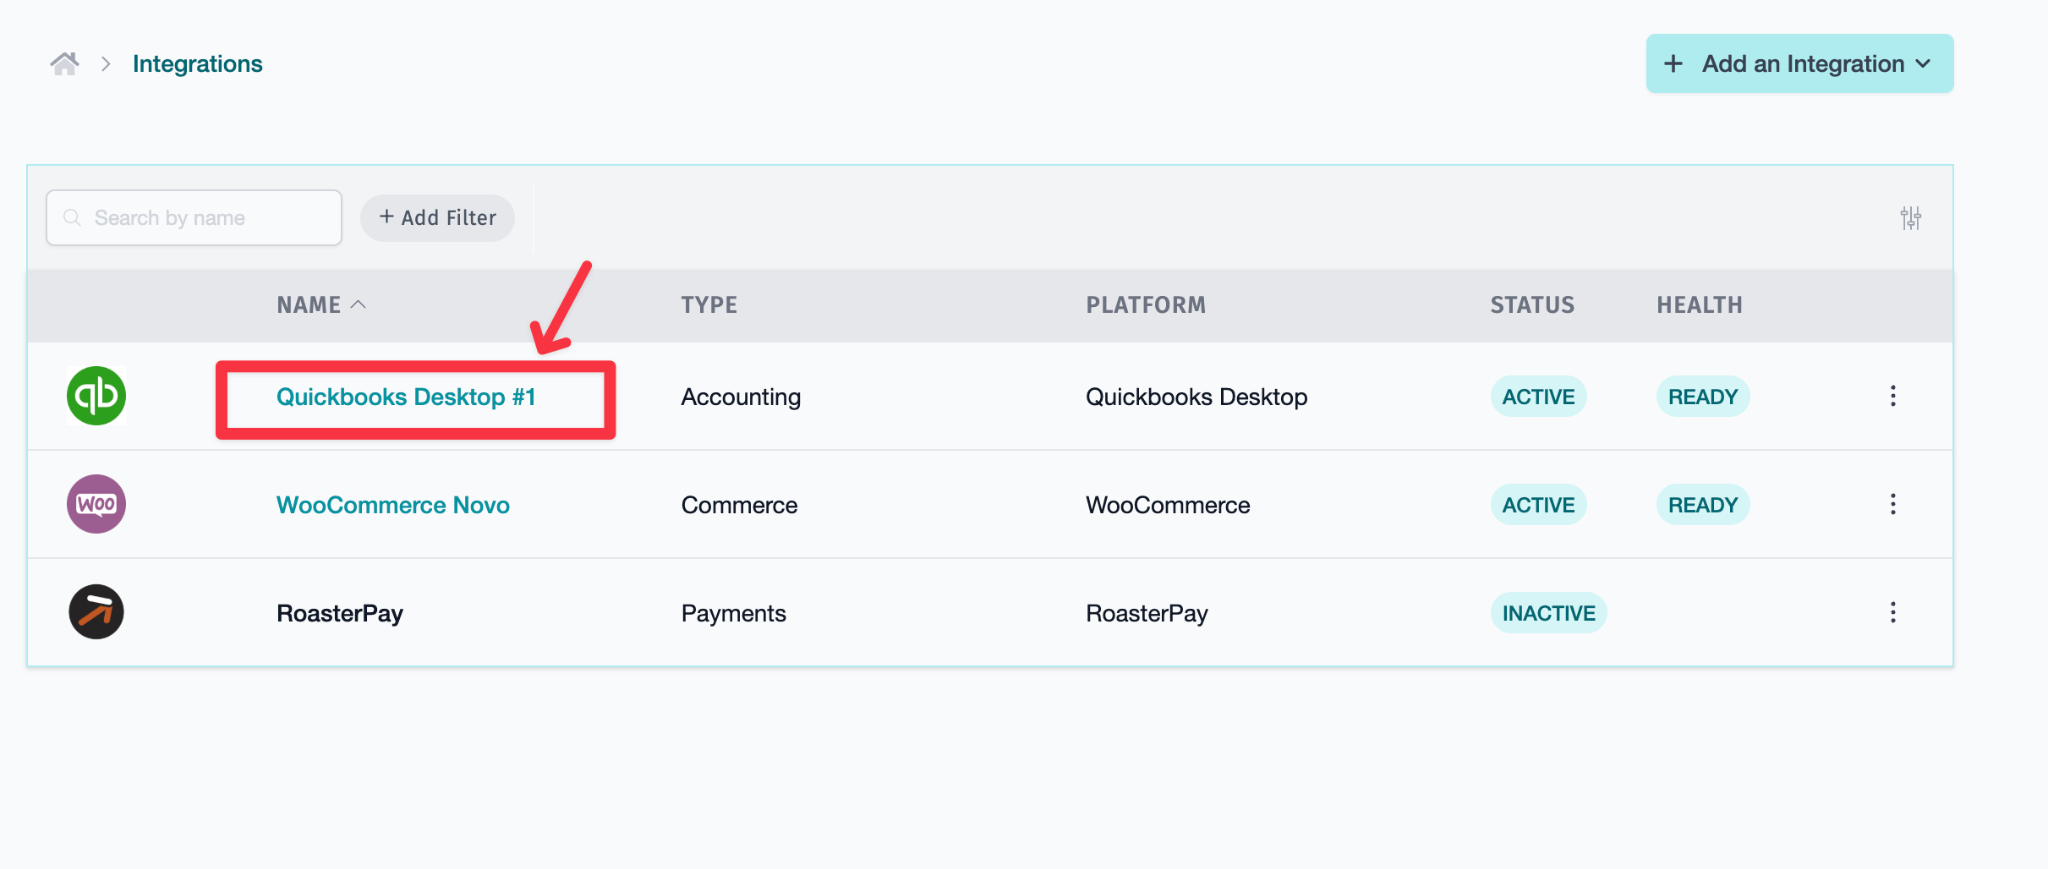
Step 1. Go to your Accounting Connection
- Go to your profile/name > integrations > Click on the name of your accounting integration
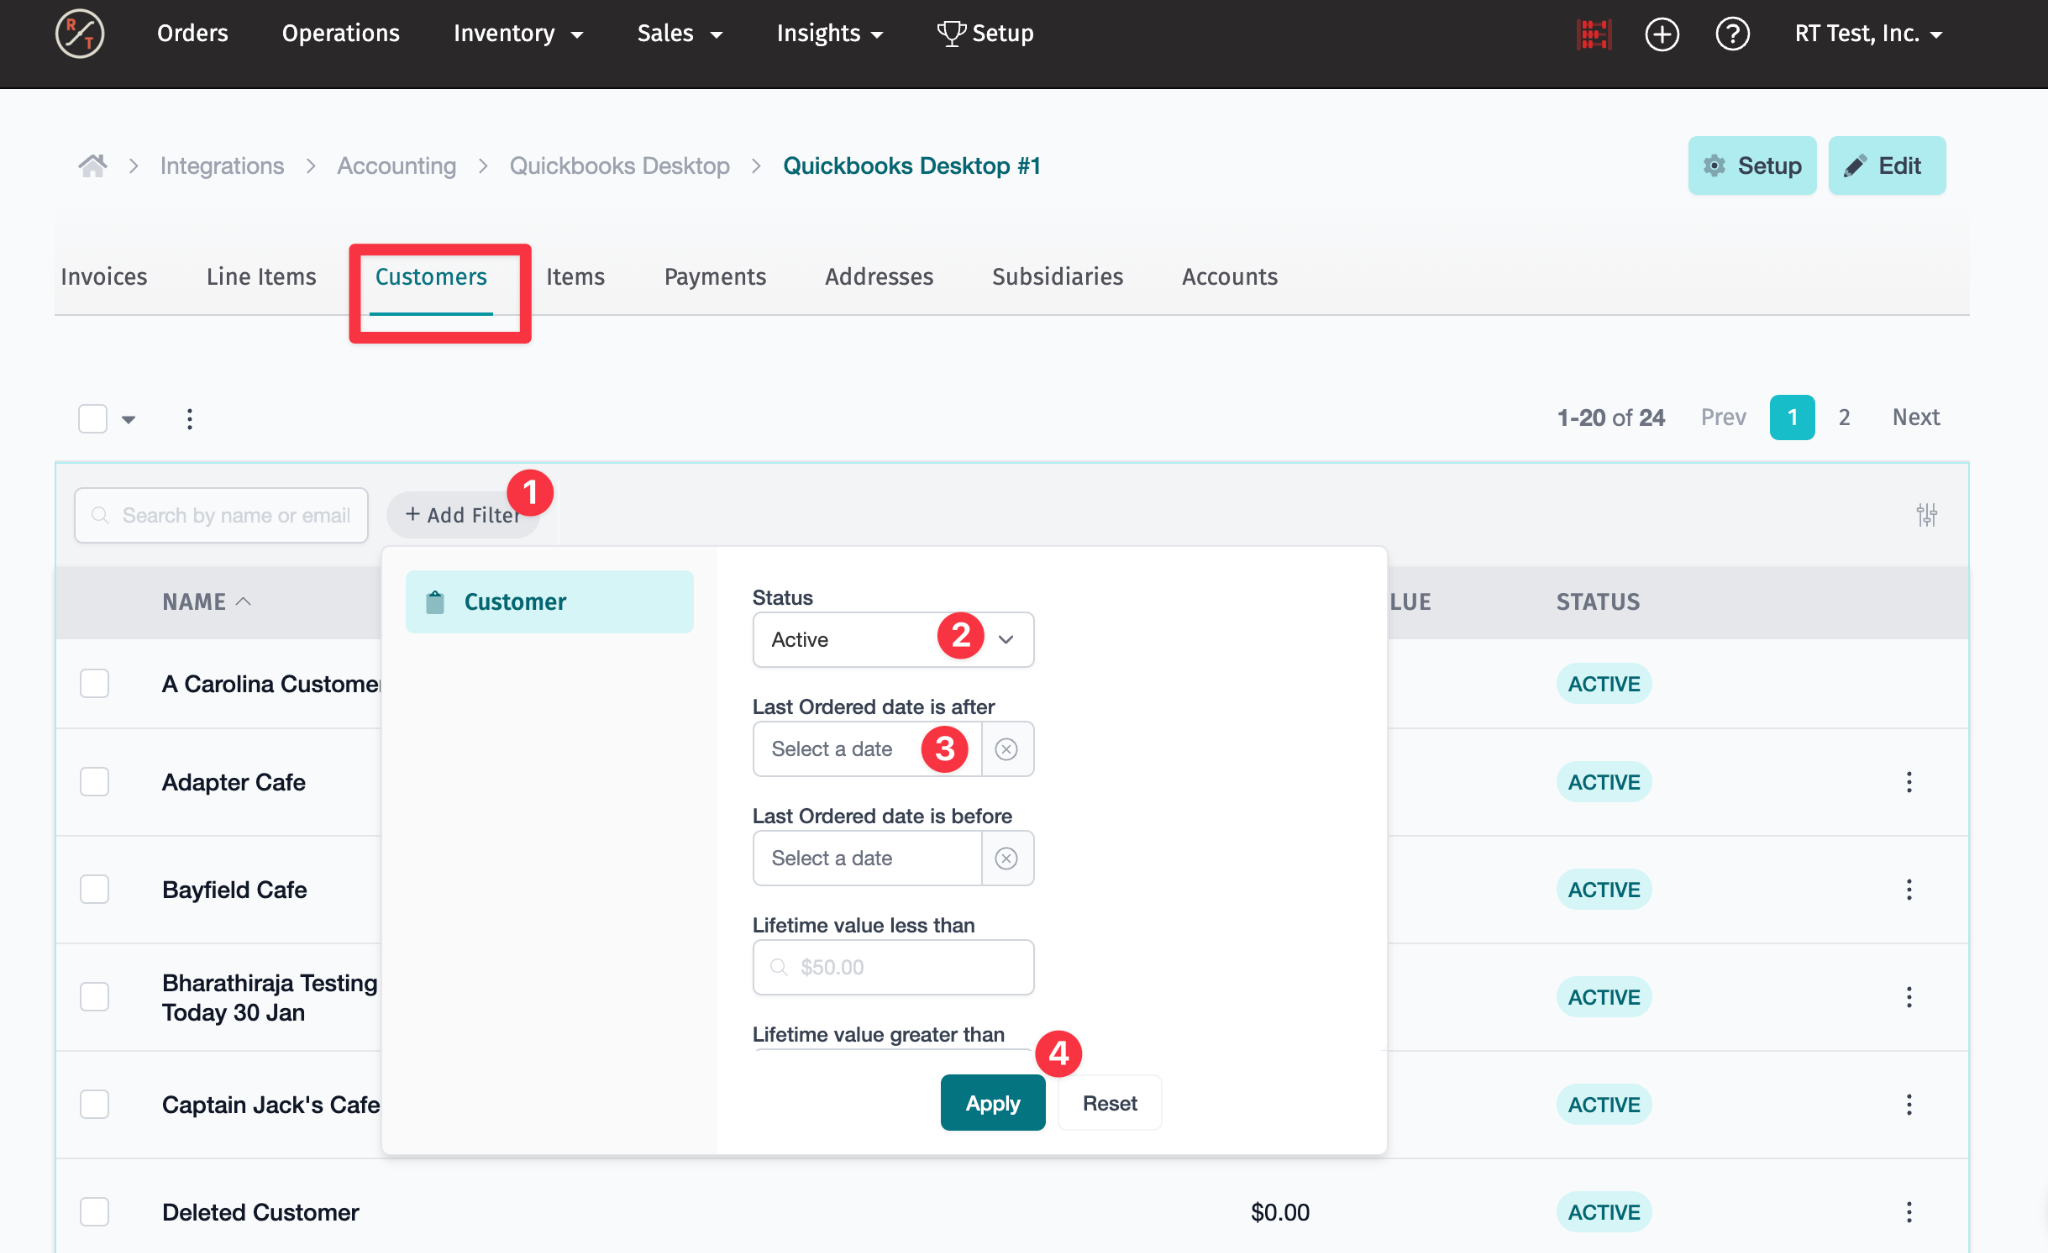
2. Navigate to Customer Tab
In RoasterTools, go to
Name > Integrations > select accounting integration name > select the customer tab (see image below if not sure what this looks like)
3. Filter Your Customer List
Before importing, apply filters to bring in only active, relevant customers:
Tips
- Start with stricter filters (more recent orders) to keep your initial customer list manageable
- You can always import additional customers later
- Importing active customers early is helpful because you'll need customer data when setting up products with customer-specific pricing, exclusive products, and assigning delivery routes
- Last Order Date Filter: Set a date range (e.g., "last order date is after [6 months ago]") to import only customers who have ordered recently
- Choose your cutoff based on your business needs—some use 3 months, others 6 months (or more)
- Remember: You can always add individual customers later if someone who hasn't ordered in a while needs to place an order
- Status Filter: Select Active to import only customers marked as active in QuickBooks
- This alone can reduce your import by half
4. Select and Import
- After applying filters, review the narrowed list
- Click Select All (top left check box) or manually select specific customers
- Click Import to bring those customers into RoasterTools
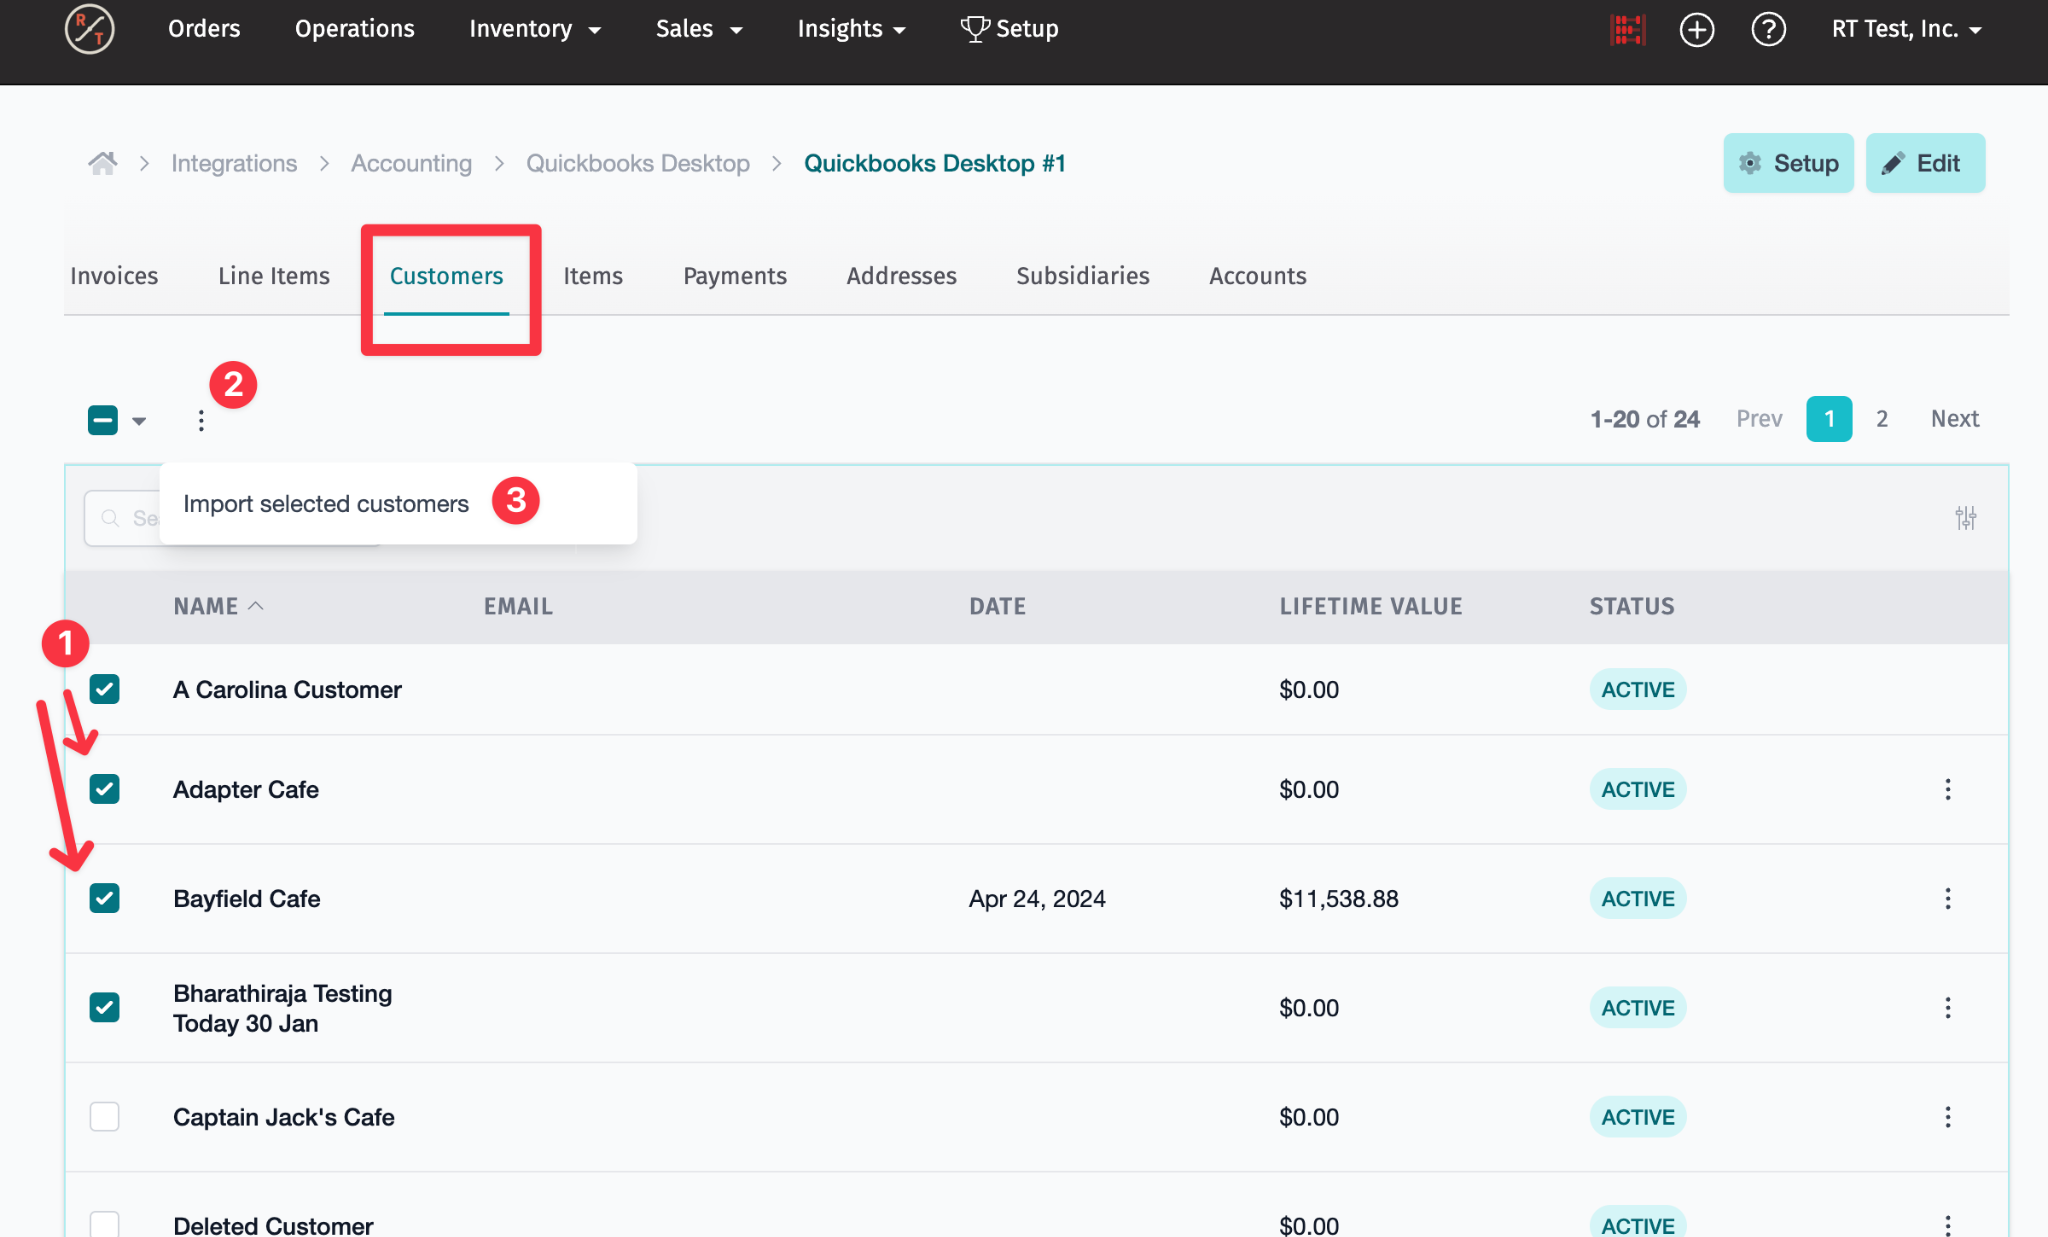
Once imported, the customers and the associated contacts will now be listed in RoasterTools
Reviewing Customer and Contact Data After Import
After importing customers from your accounting platform, review your customer and contact records to make sure the data came in correctly.
Why This Step Matters
When customers are imported from your accounting platform, the data that comes in depends many factors and not all fields transfer perfectly.
Export and Review Your Customer List
The easiest way to review your imported customer data is to export a CSV from RoasterTools and check it in a spreadsheet.
- Go to Name > Settings > Import Export > Customers > Download the CSV of wholesale customers
- Open the CSV in Excel or Google Sheets to review the data across all columns.
- Review each field using the checklist below to identify anything that needs to be corrected or added.
What to Check
Use this checklist to review the key fields in your exported customer data. For each field, check that the information is present, accurate, and formatted correctly.
There are many fields on the CSV - at this point you only need to review the key fields to ensure accuracy. The other fields can be updated at another point during setup.
Key Required Fields in the CSV to Review at this point:
- Company Name
- Shipping Street 1
- Shipping City
- Shipping State
- Shipping Zip
- Shipping Country
- Billing Street 1
- Billing City
- Billing State
- Billing Zip
- Billing Country
| Field | What to Look For | Common Issues |
| Company Name | Confirm the business name is correct and matches how you refer to this customer. | May include extra characters or formatting from QuickBooks. |
| Billing Address | Review street address, city, state, and zip. All four components should be present and accurate. |
|
| Shipping Address |
Confirm this matches the actual delivery location. It is sometimes different than billing address
|
|
Update Customer Data
- After making edits in the sheet, Save and download the updated sheet as a CSV
- Go to Name > Settings > Import Export > Customers > import - select the csv to import
- Review email: you'll get an email with the success and failure of the upload.
- If failures: make updates and review process
- Recommended: Redownload the customer sheet to review updates
Update Contact Data
Contacts are individuals that are assigned to customers. You can view contacts under main toolbar > Sales > Contact.
- Contacts can be assigned to 1 or more Customers
- Multiple contacts can be assigned to 1 Customer
How to Export and Review Your Contact List
The easiest way to review your imported contact data is to export a CSV from RoasterTools and review it in a spreadsheet.
- Go to Name > Settings > Import Export > Contacts > Download the CSV
- Open the CSV in Excel or Google Sheets.
- Review each field identify anything that needs to be corrected or added
What to Check in CSV
- Email Address: (required) Contacts are identified by their Email Address - this is the key info they use to login to the portal.
- First and Last Name - (optional)
- Customer: Contacts are assigned to one or more customers. Use the Customer 1 field for the first customer, Customer 2 field for the second customer and so on.
Update Contact Data
- After making edits in the sheet, Save and download the updated sheet as a CSV
- Go to Name > Settings > Import Export > Contacts > import - select the csv to import
- Review email: you'll get an email with the success and failure of the upload.
- If failures: make updates and review process
- Recommended: Redownload the contact sheet to review updates
Tips
- Only import active customers.
- Review your customer data after importing.
- Pay special attention to the billing and shipping address fields. These often have clean up required and are key to having accurate information on your invoices for customers.
- Don't worry about the other customer fields yet - you can update those later during setup.