How to Create Other Products (non-coffee)
Overview:
Note: If you are creating a product that will have options (such as a shirt with size options or a syrup with flavor options), you need to create the option sets FIRST. Then create the product.
See this article on setting up options here.
Creating Other Products
Step 1
- In the menu bar, click the drop drop arrow next to Inventory and choose Products

Step 2
- In the Product Page, click the New Product button on the left and choose Other

Step 3
- Fill out the information on the Product page about the product.
- Use the Question Marks "?" to learn the meaning of a something while in the app. A black box will pop up (as below) with more details.

Choosing Options
Note: If you haven't created the option sets needed for your products, you need to do that first. Review this article to help you get them set up.
If you have your option sets already created, you can choose how many options there are for each product.
A t-shirt product that has only size options would use one option. And a t-shirt product that has both size and color choices would have two options.
Step 1
- Choose how many options a product has (or choose no option)
- If there are options, choose the first option
- Press save
- If there are more options, repeat the above steps

- After you choose your options, Press Refresh Variants to update the variant matrix.
Note: the order in which you place the options is how they display on the wholesale portal. See the image below for example

Activate Variants
After setting up the options, you're ready to dive into the variants (and almost finished with the product setup!).
Step 1
- Choose which variants are available for each options and toggle them on and off as needed.
- Fill out the information for each variant about cost, weight and wholesale price.
- If the variants share the same information for one option (example all small shirts are the same cost) enter the information in the top bar (shaded in light blue) and it will autofill for the remaining fields.

Step 2
- After filling in all the information for the different variants, scroll to the bottom of the page and click Create Product

Nice work 🙌 You now have products ready to sell!
Deactivating Products
In RoasterTools, products are either listed as active or inactive. This allows users to remove products from their active lists, without actually deleting their data. We don't delete products to preserve data for historical reports .
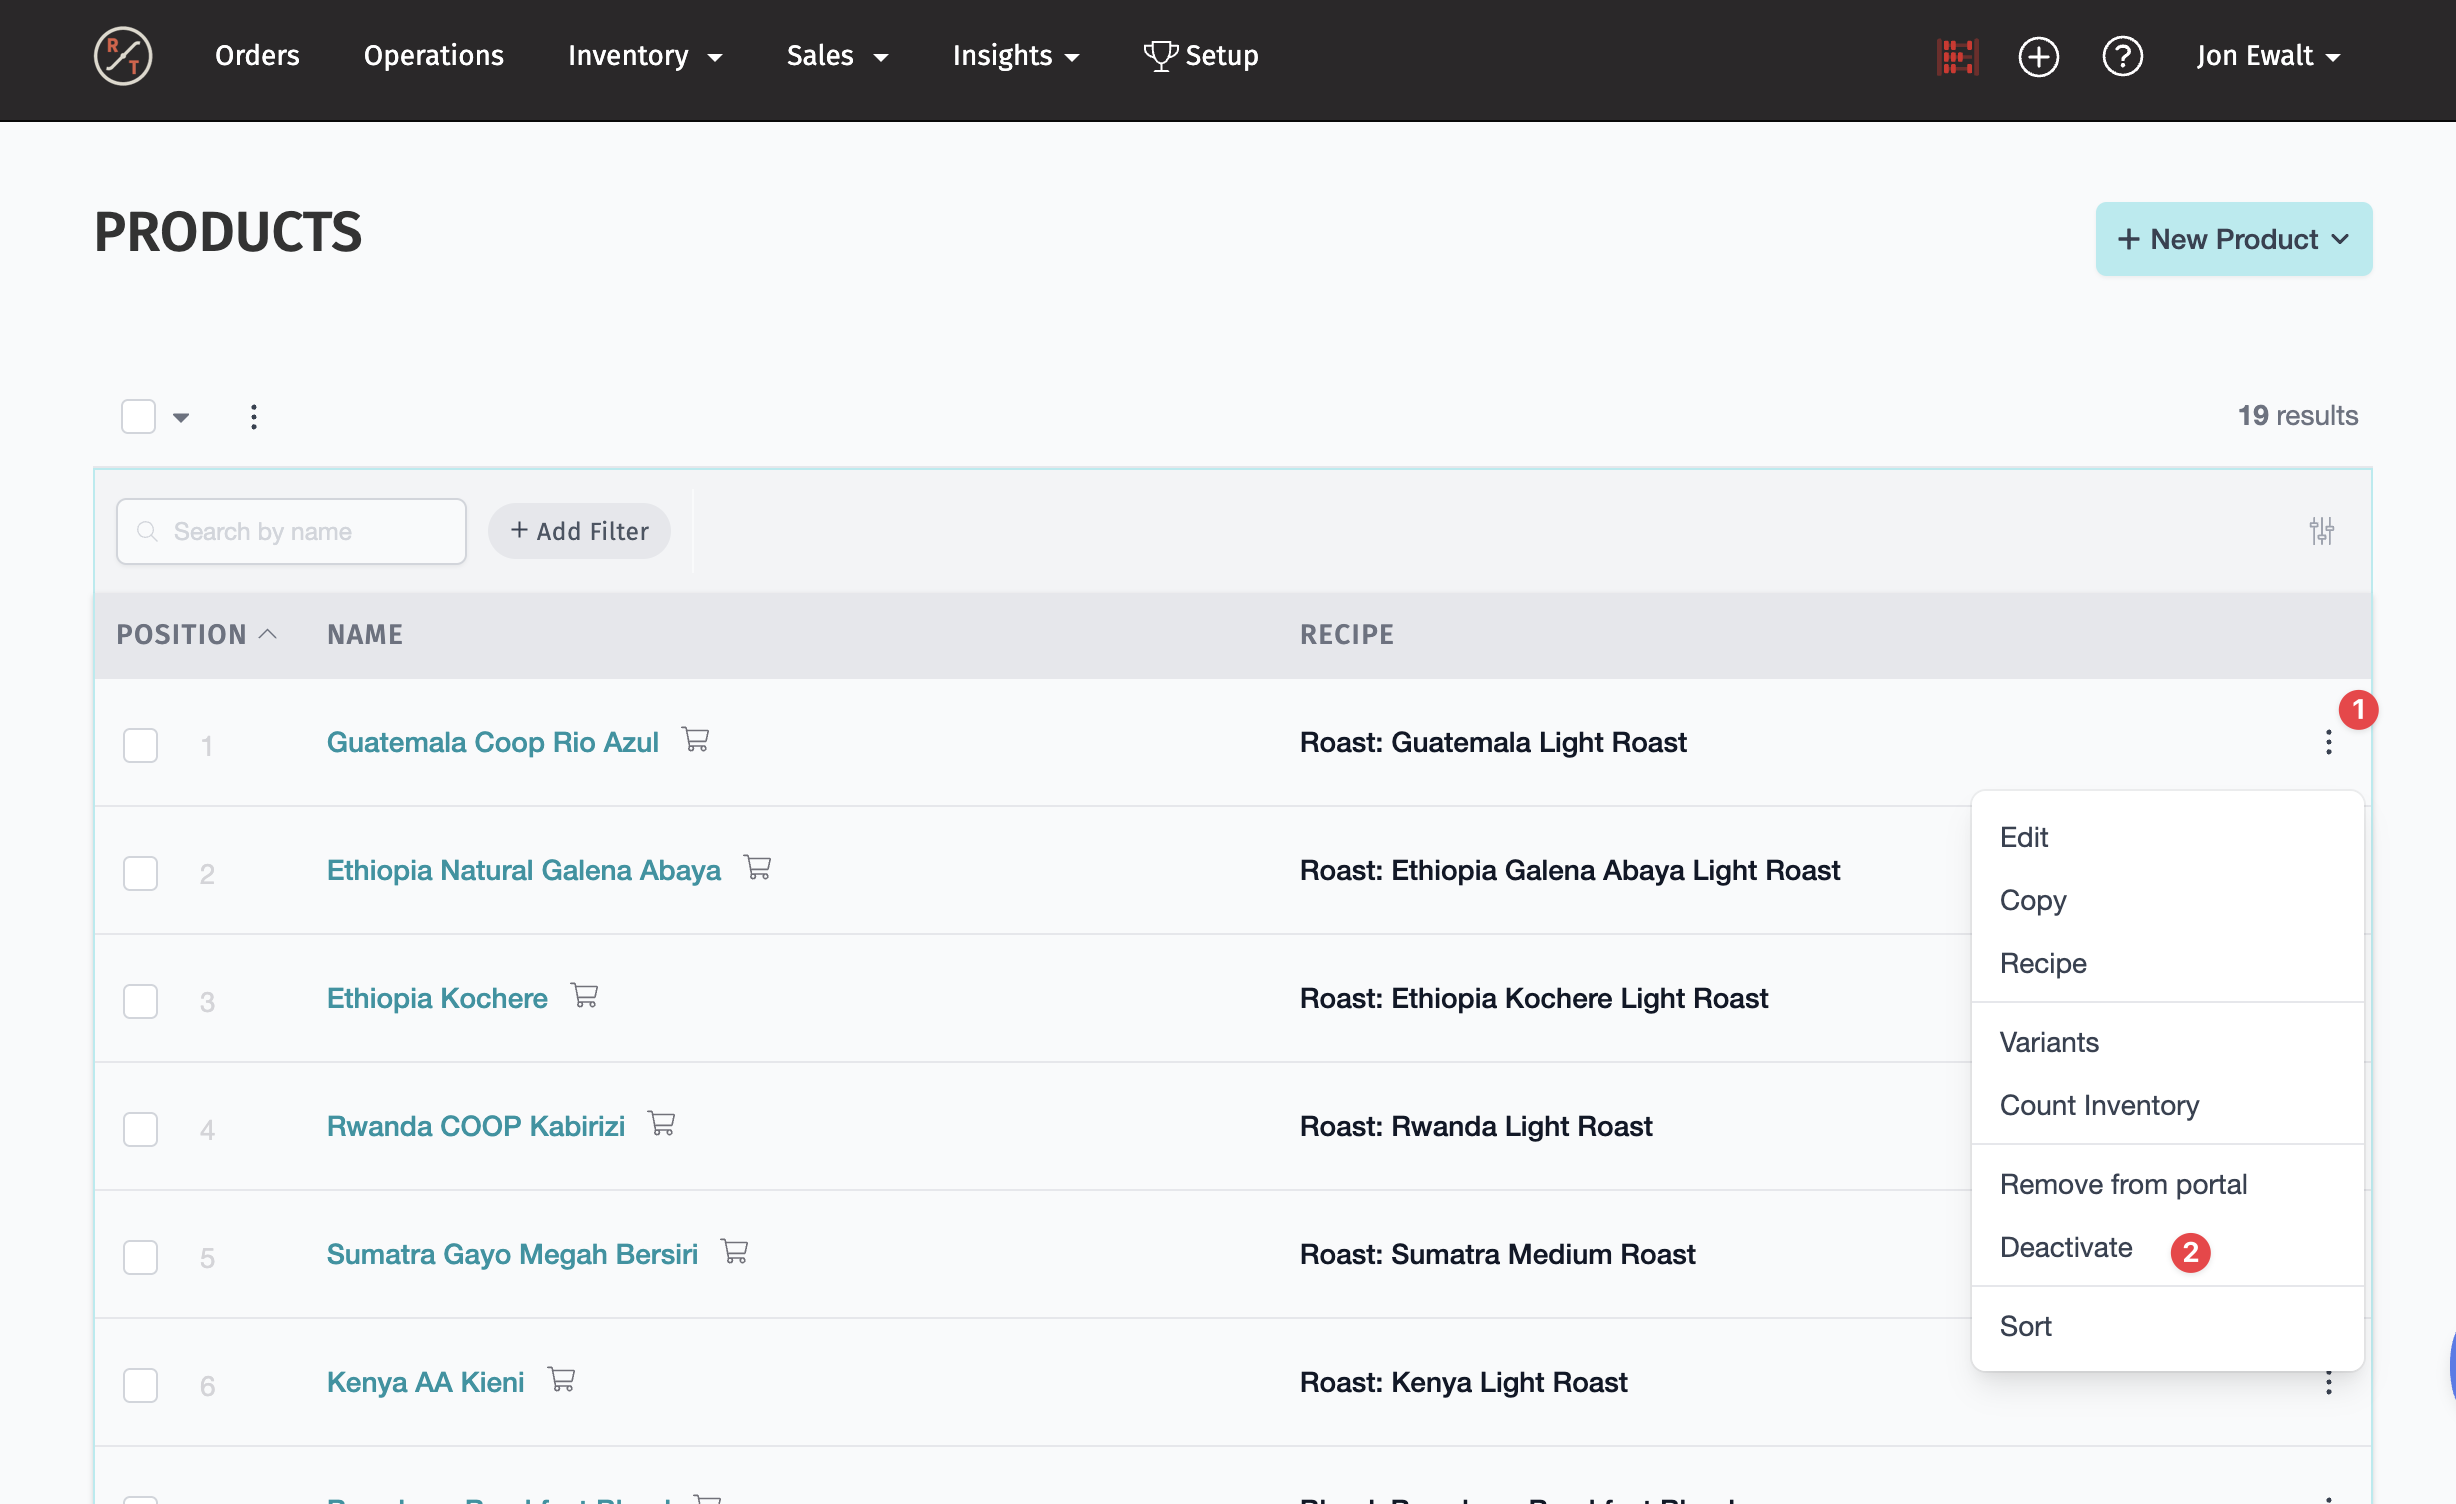
Deactivate One product:
From the Product list page select three dots > deactivate
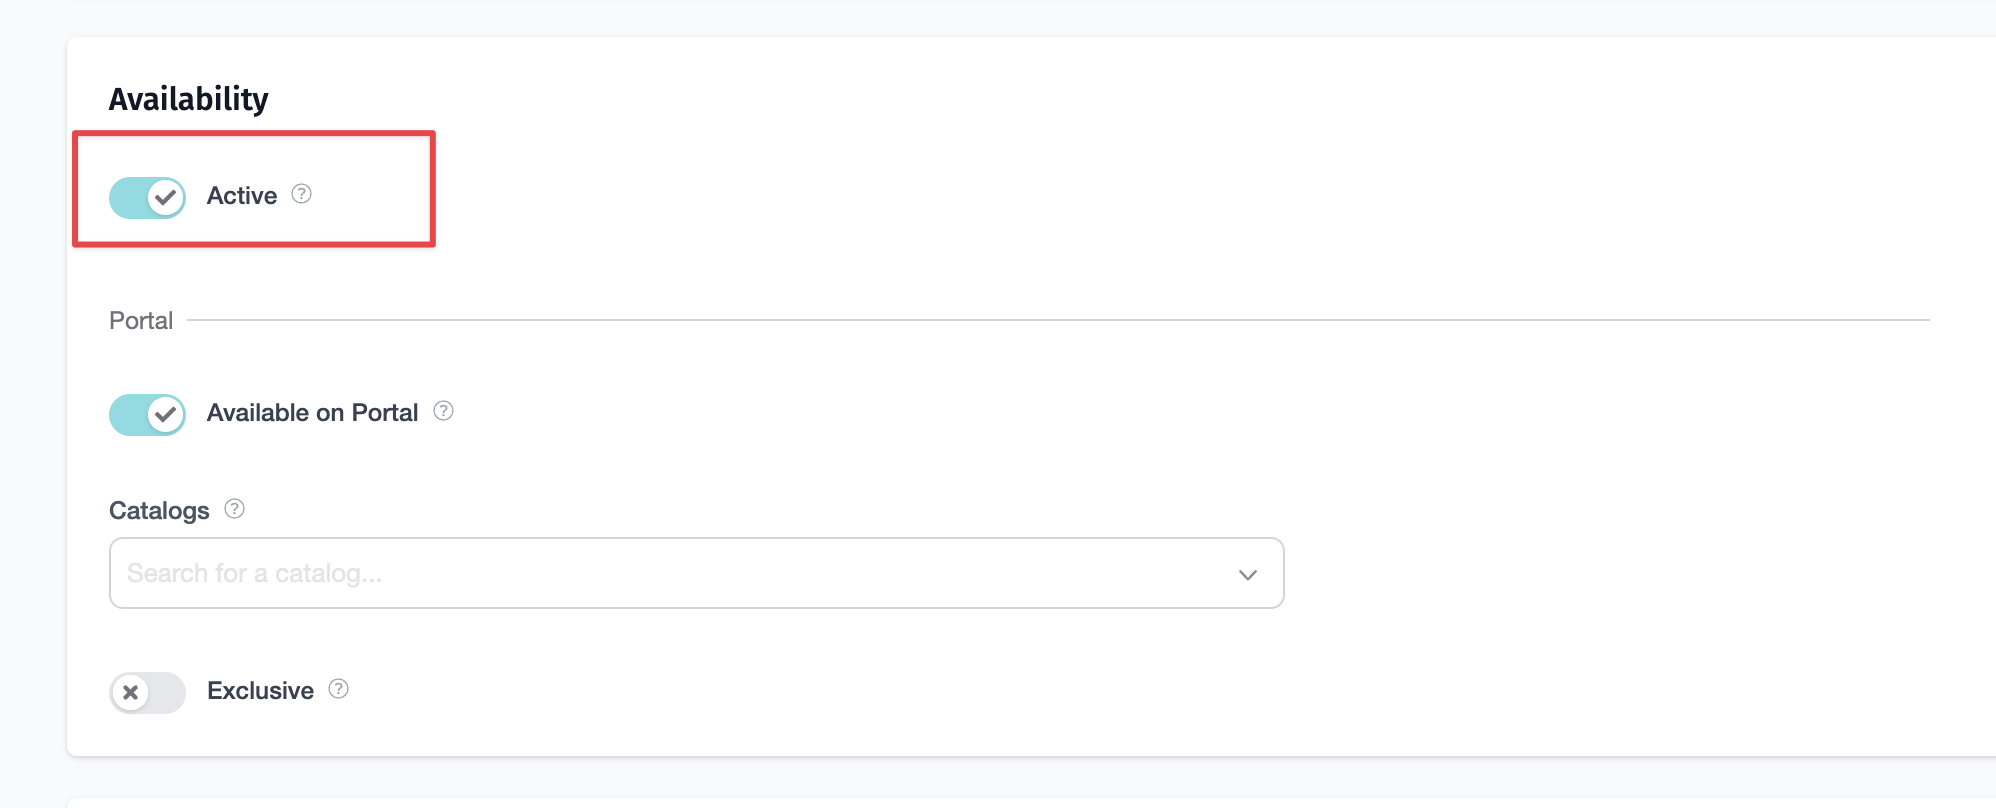
From the Product Edit Page
Within the Product Edit page you can toggle off Active to deactivate:
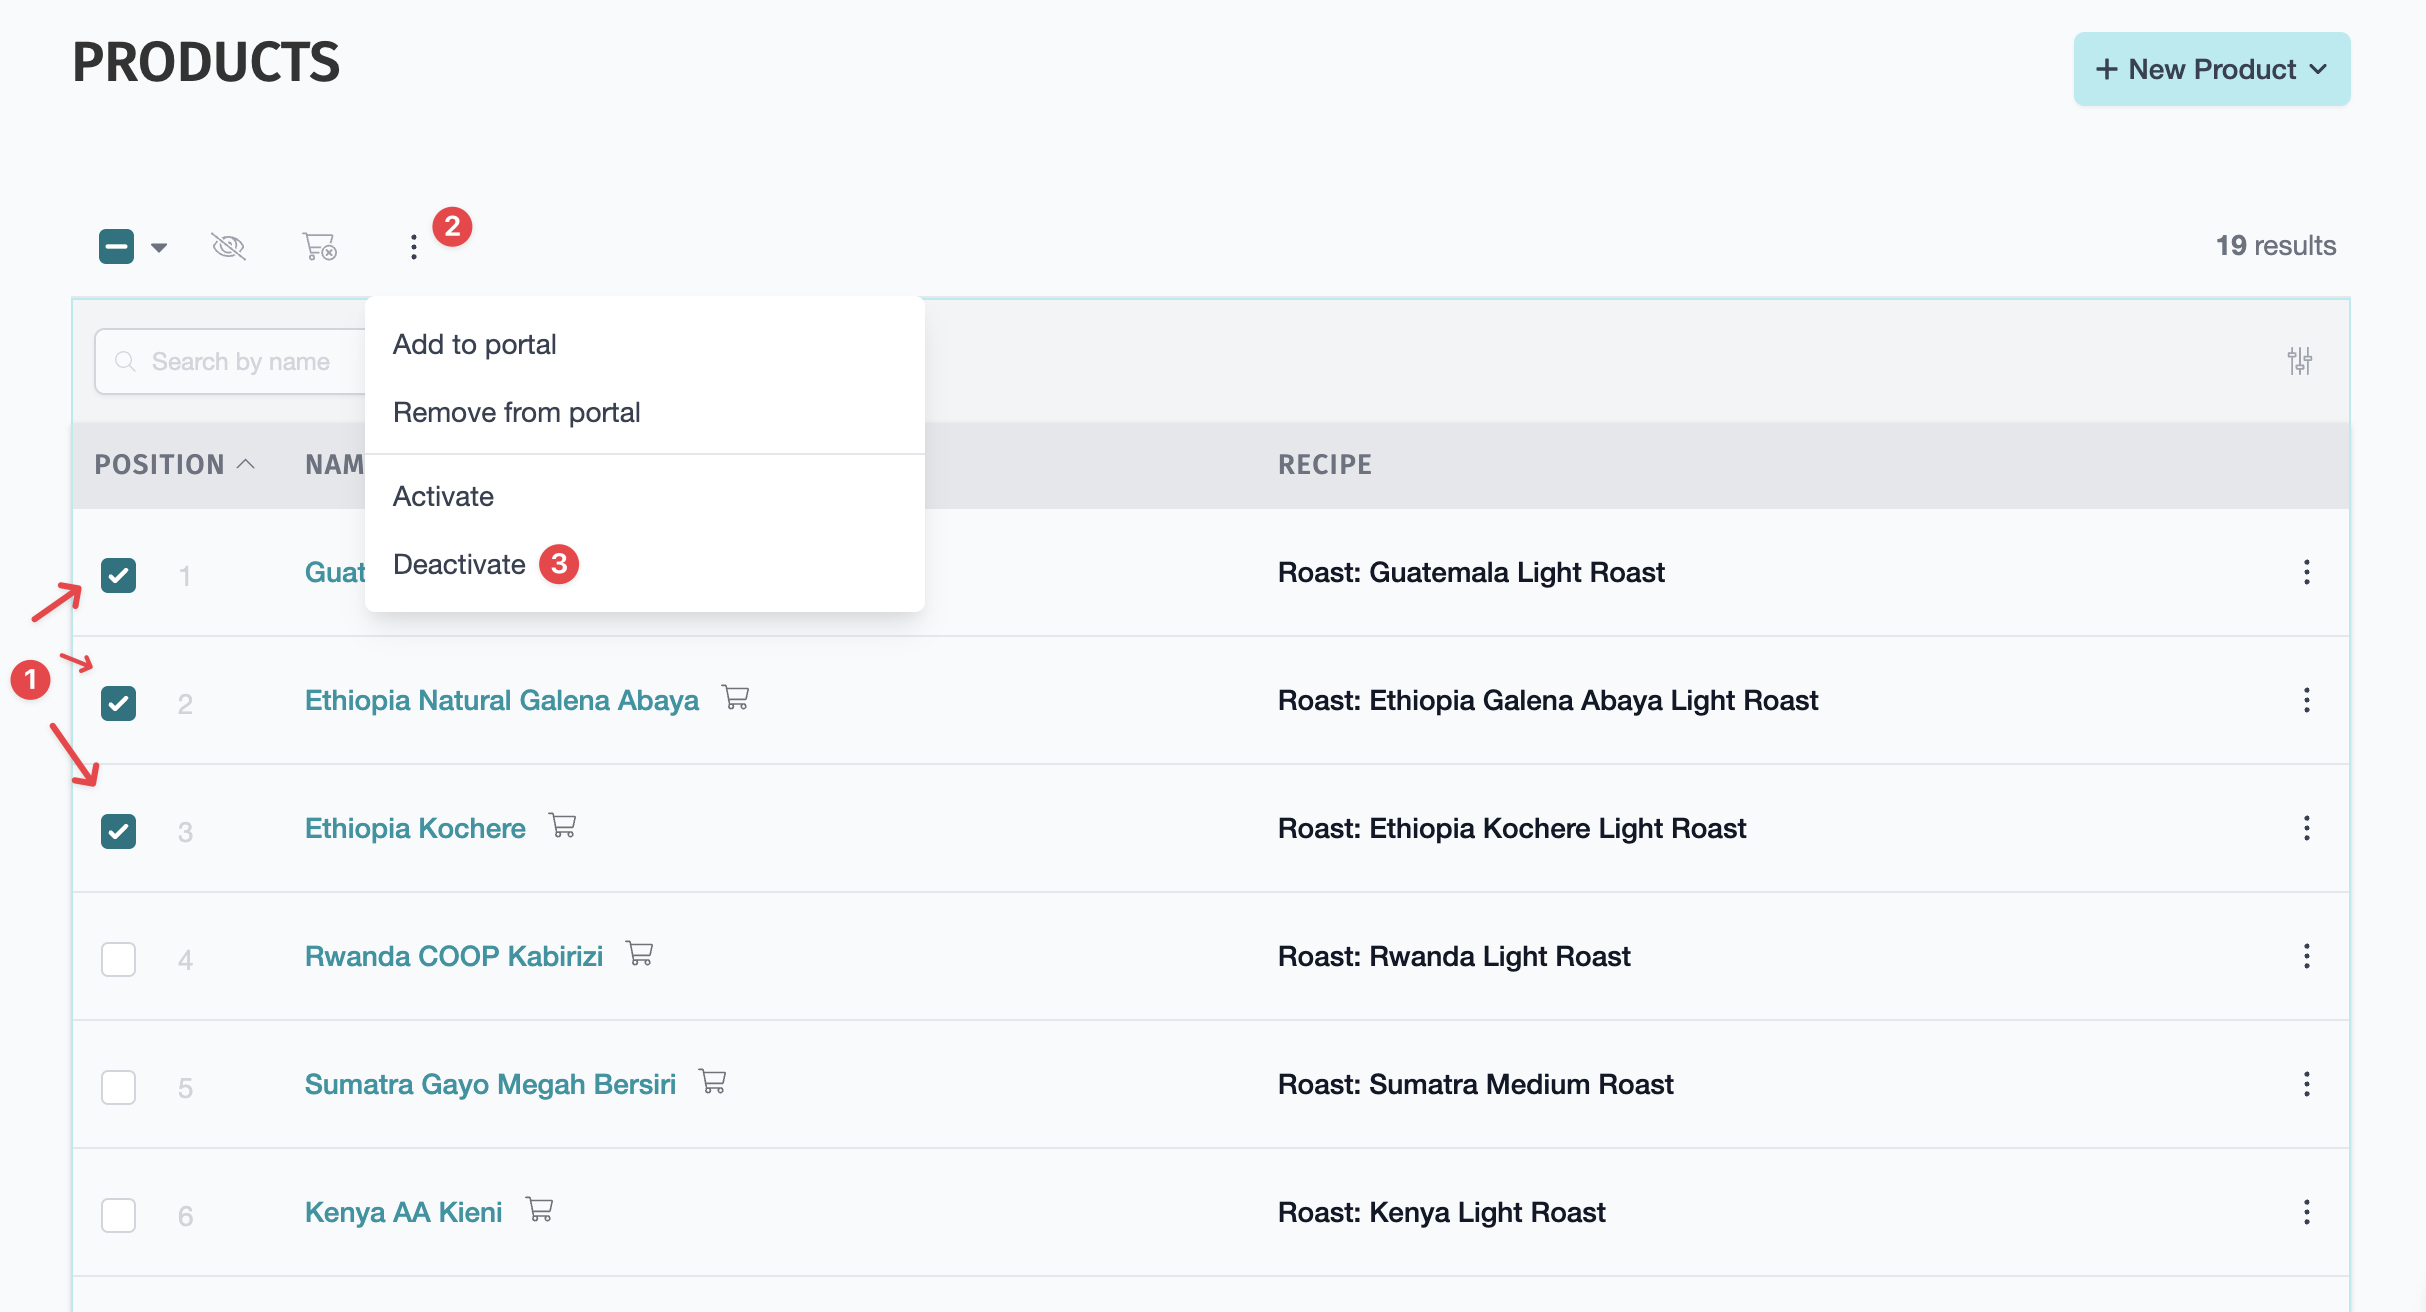
Deactivate Multiple Products:
You can select multiple products at one time and deactivate them.
From the Product List page
- select the box of product you'd like to deactive
- select the three dots at the top of the product list
- select Deactivate
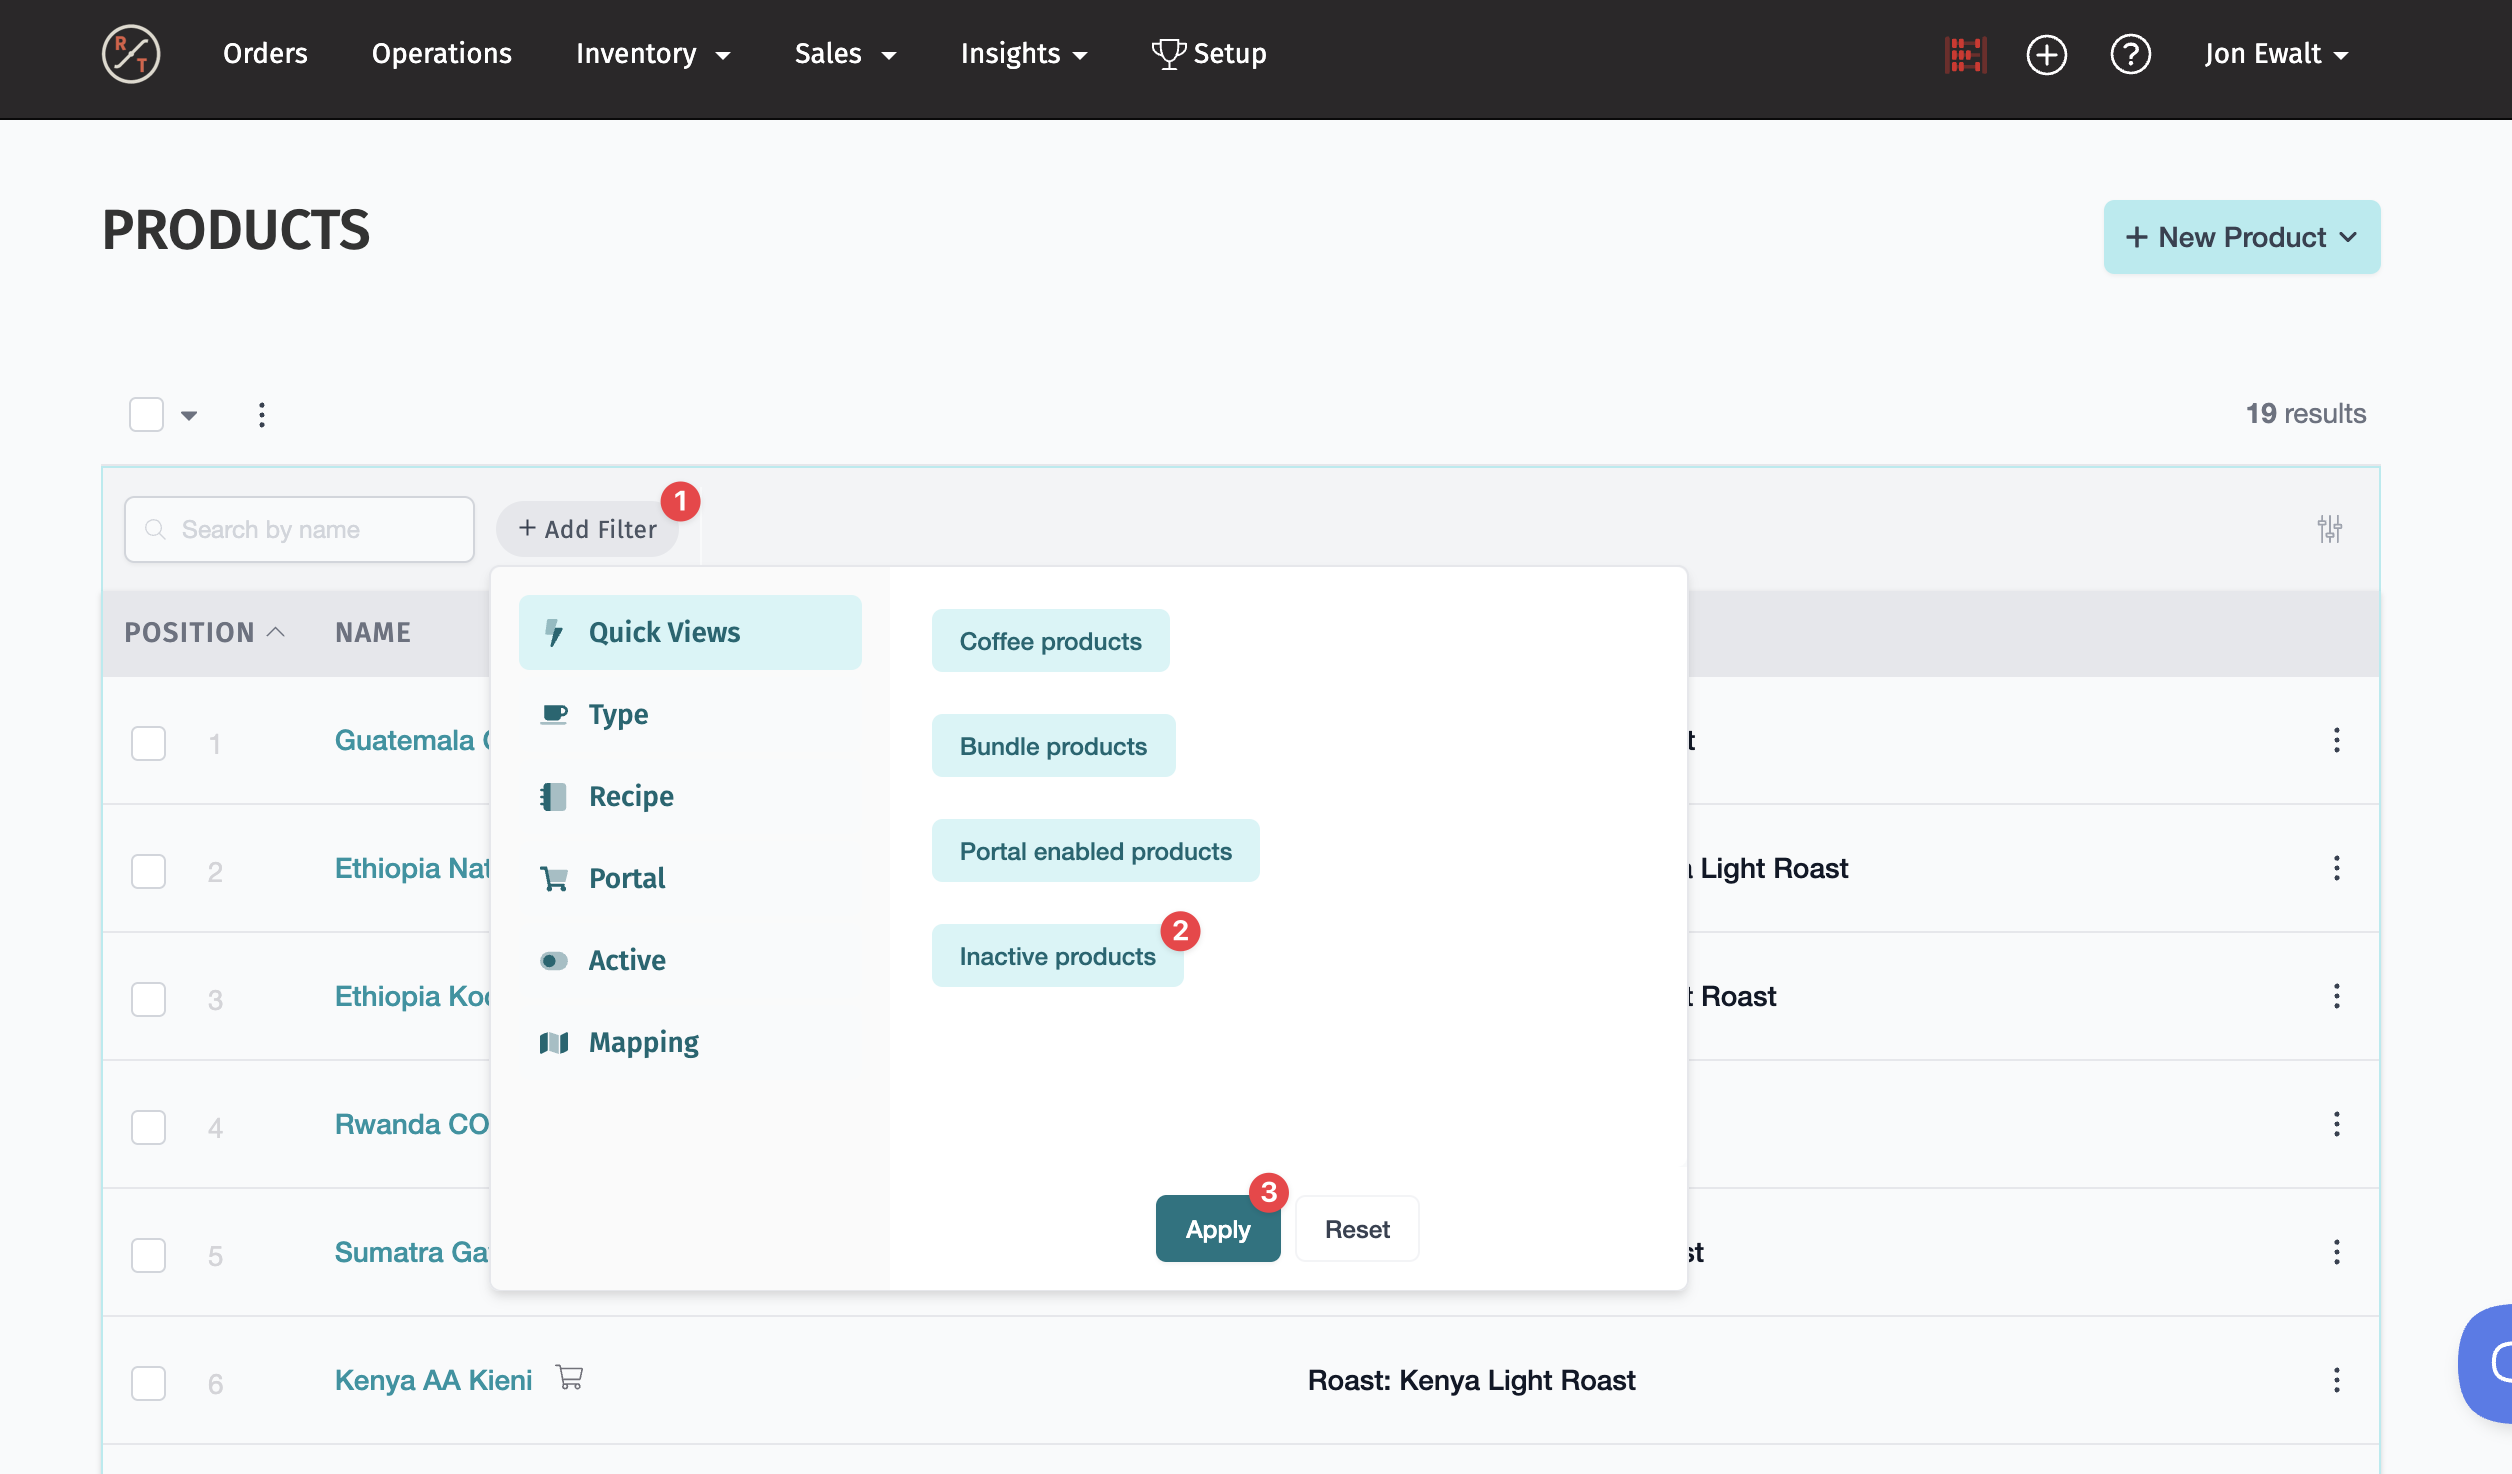
View Inactive Products
The product list page defaults to show active products. To view what products are marked as Inactive you can apply a filter on the product list page
- Add filter
- Inactive Products
- Apply
You can Reactivate a product if you like, just check to ensure if it is a coffee product, that the recipe (roast or blend) is still active. Example: Often roasters will have seasonal product that they may deactivate for majority of the year and only activate when they are selling it.
Similar Articles
To create other types of products, take a look at these other help articles: