Wholesale Portal: Setting Up and Testing the Portal
Setting up the portal and viewing with a test customer lets you experience the Wholesale Portal exactly the way your customers will - before you invite anyone in. This article walks you through creating a test product, enabling the portal, setting up a test customer, and previewing the portal from their perspective.
Creating a test product
Start by creating a simple product so you can see how it displays in your portal. We start with a non coffee product because it doesn't require setting up your coffee ingredient data first.
- In the menu bar, click the dropdown arrow next to Inventory and choose Products.

- On the Products page, click New Product on the left and choose Other.

- Fill in the basic product details. Click the question mark icons (?) next to any field for a quick explanation.
- Make sure the product is set to Active and Available on the Portal.

- Fill in the description fields — these will appear on the portal.
- Skip the Catalogs and Exclusivity sections for now.
- Upload an image if you want the full portal preview experience (optional, but recommended).
- No need to change the category — the product will auto-assign to "Other."
- Skip the Options section.
- Enter a placeholder weight and price, then click Create.
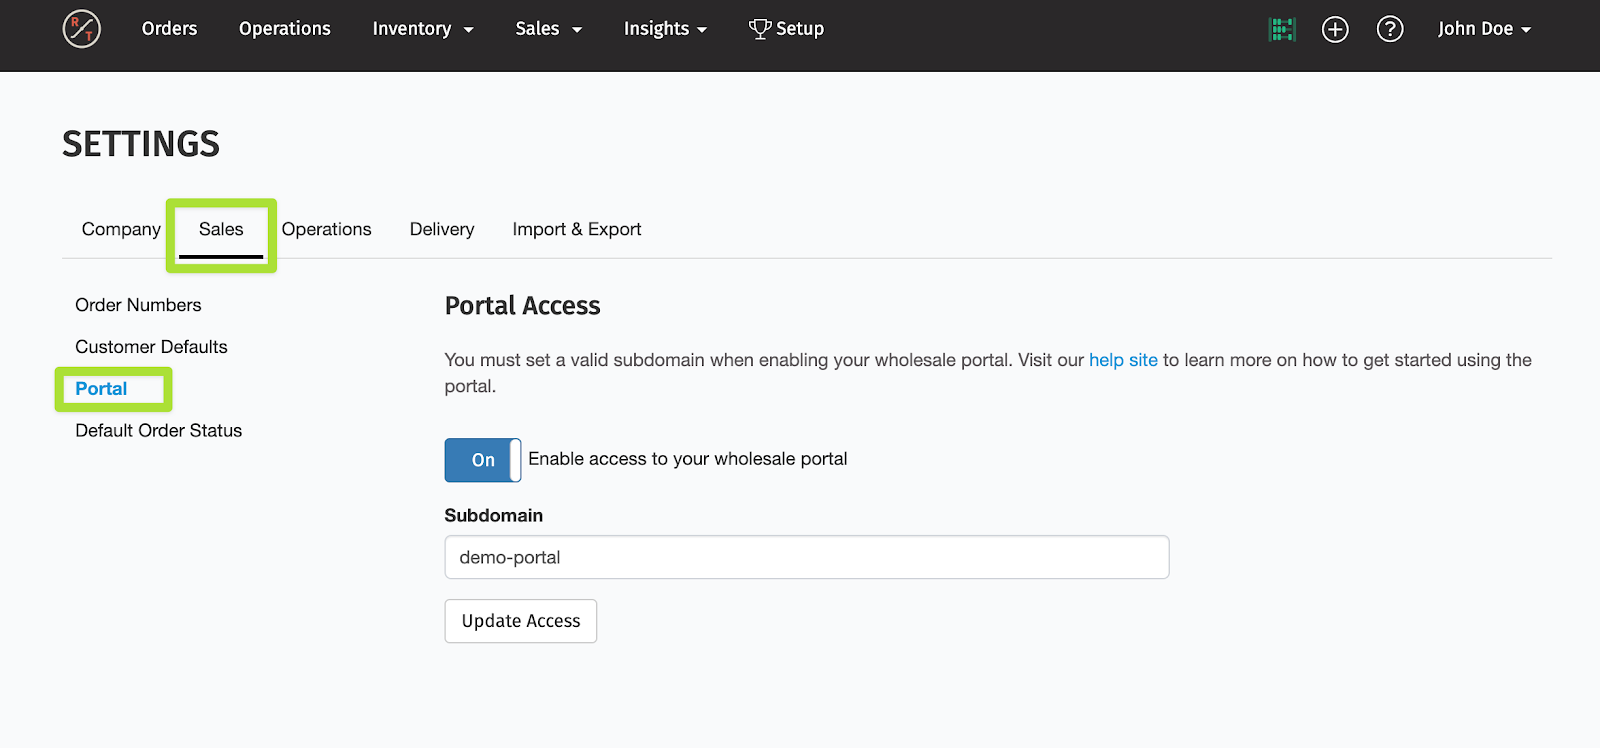
Enabling the portal
Before customers can access the portal, you need to turn it on and set up a custom subdomain for your wholesale store.
- Click your name in the top-right corner and select Settings.
- Navigate to Sales > Portal.
- Toggle the portal to ON and enter a subdomain for your store. Choose something short — for example, Big Tree Coffee Roasters might use bigtree, making their portal URL bigtree.roastertools.com.
- Click Update Access.
Your portal is now enabled and ready for customers!
Creating a test customer
A test customer lets you log into the portal and see exactly how your products appear. You'll create a contact first, then link it to a customer account.
Create yourself as a contact
- Navigate to Sales > Contacts.
- Click Create New Contact in the top right.
- Enter your name and email, then click Create Contact. Name it something like "Test Customer" so it's easy to find later.

Create a test customer account
- Navigate to Sales > Customers.
- Click Create New Customer in the top right.
- Fill in the basic info and skip the optional section.
- Return to the customer list and click Edit on your new test customer.
- Scroll to the Contacts section. Search for your test contact in the search bar and click Link Selected Contacts.
- Send a portal invitation to the contact.

- Check your email and accept the portal invitation.
- You can log into the portal directly from the invitation link.
- Back in RoasterTools, click the open portal icon (square with arrow) next to the customer to open the portal from inside the app.

Heads up: If Test Mode is enabled, portal invitation emails are only sent to the email address listed in your Settings — not to the customer's email. Make sure you're checking the right inbox.
View your portal
Once you've accepted the invitation, you can open your test customer's portal to see how products appear to customers.
Click the open portal icon (square with arrow) next to your test customer any time you want to preview the portal from their perspective.

Note: If the portal isn't active for the test customer, return to the customer list and enable the portal for that customer before trying to open it.