Bags: Creating, Updating, Settings and more
Overview
How to create a new bag
- Open the Inventory menu at the top of your screen
- Click on the Bags button
- Click “New Bag”
-
Create a Name for your bag (to make it easily identifiable)
Note: The Bag Name serves two purposes - it is Customer Facing on the portal and it also is the name that the packaging team will see to know what bag the coffee goes into
- Enter a SKU: If you don't currently use SKUs for your bags, choose something that is descriptive.
-
Enter a Weight: the weight of the coffee put into this package.
Example - a 12oz bag should have a weight of .75 lbs
- Cost: Enter the cost of the Bag - these costs are used to calculate the cost of goods in producing your coffee products. You have to enter something into this field, even if it's zero. You can always update it later.
- Default: The default setting is to indicate your most common bags. If a bag is noted as default, it will automatically be active when you create a new coffee product. Bags that are not default, will not be active on new coffee products. However, the bag can always be turned on to active easily.
TIP: Not every package is a traditional bag. Example: If you produce and deliver coffee in a 15 lb bucket to a customer or your own cafes, you should make a "Bag" for this product.
How to use a new bag in an Existing coffee product
If you already have products created and you'd like to use this bag for an existing product, you can. It won't be automatically active. Here's how to activate it for each coffee that you want to use this bag:
- Visit Products to view all of your current Products; clicked Edit on the product that you'd like to add the bag to
- Scroll down to the Variants & Pricing section, and find the new bag that you just created
- Toggle on the new bag option
-
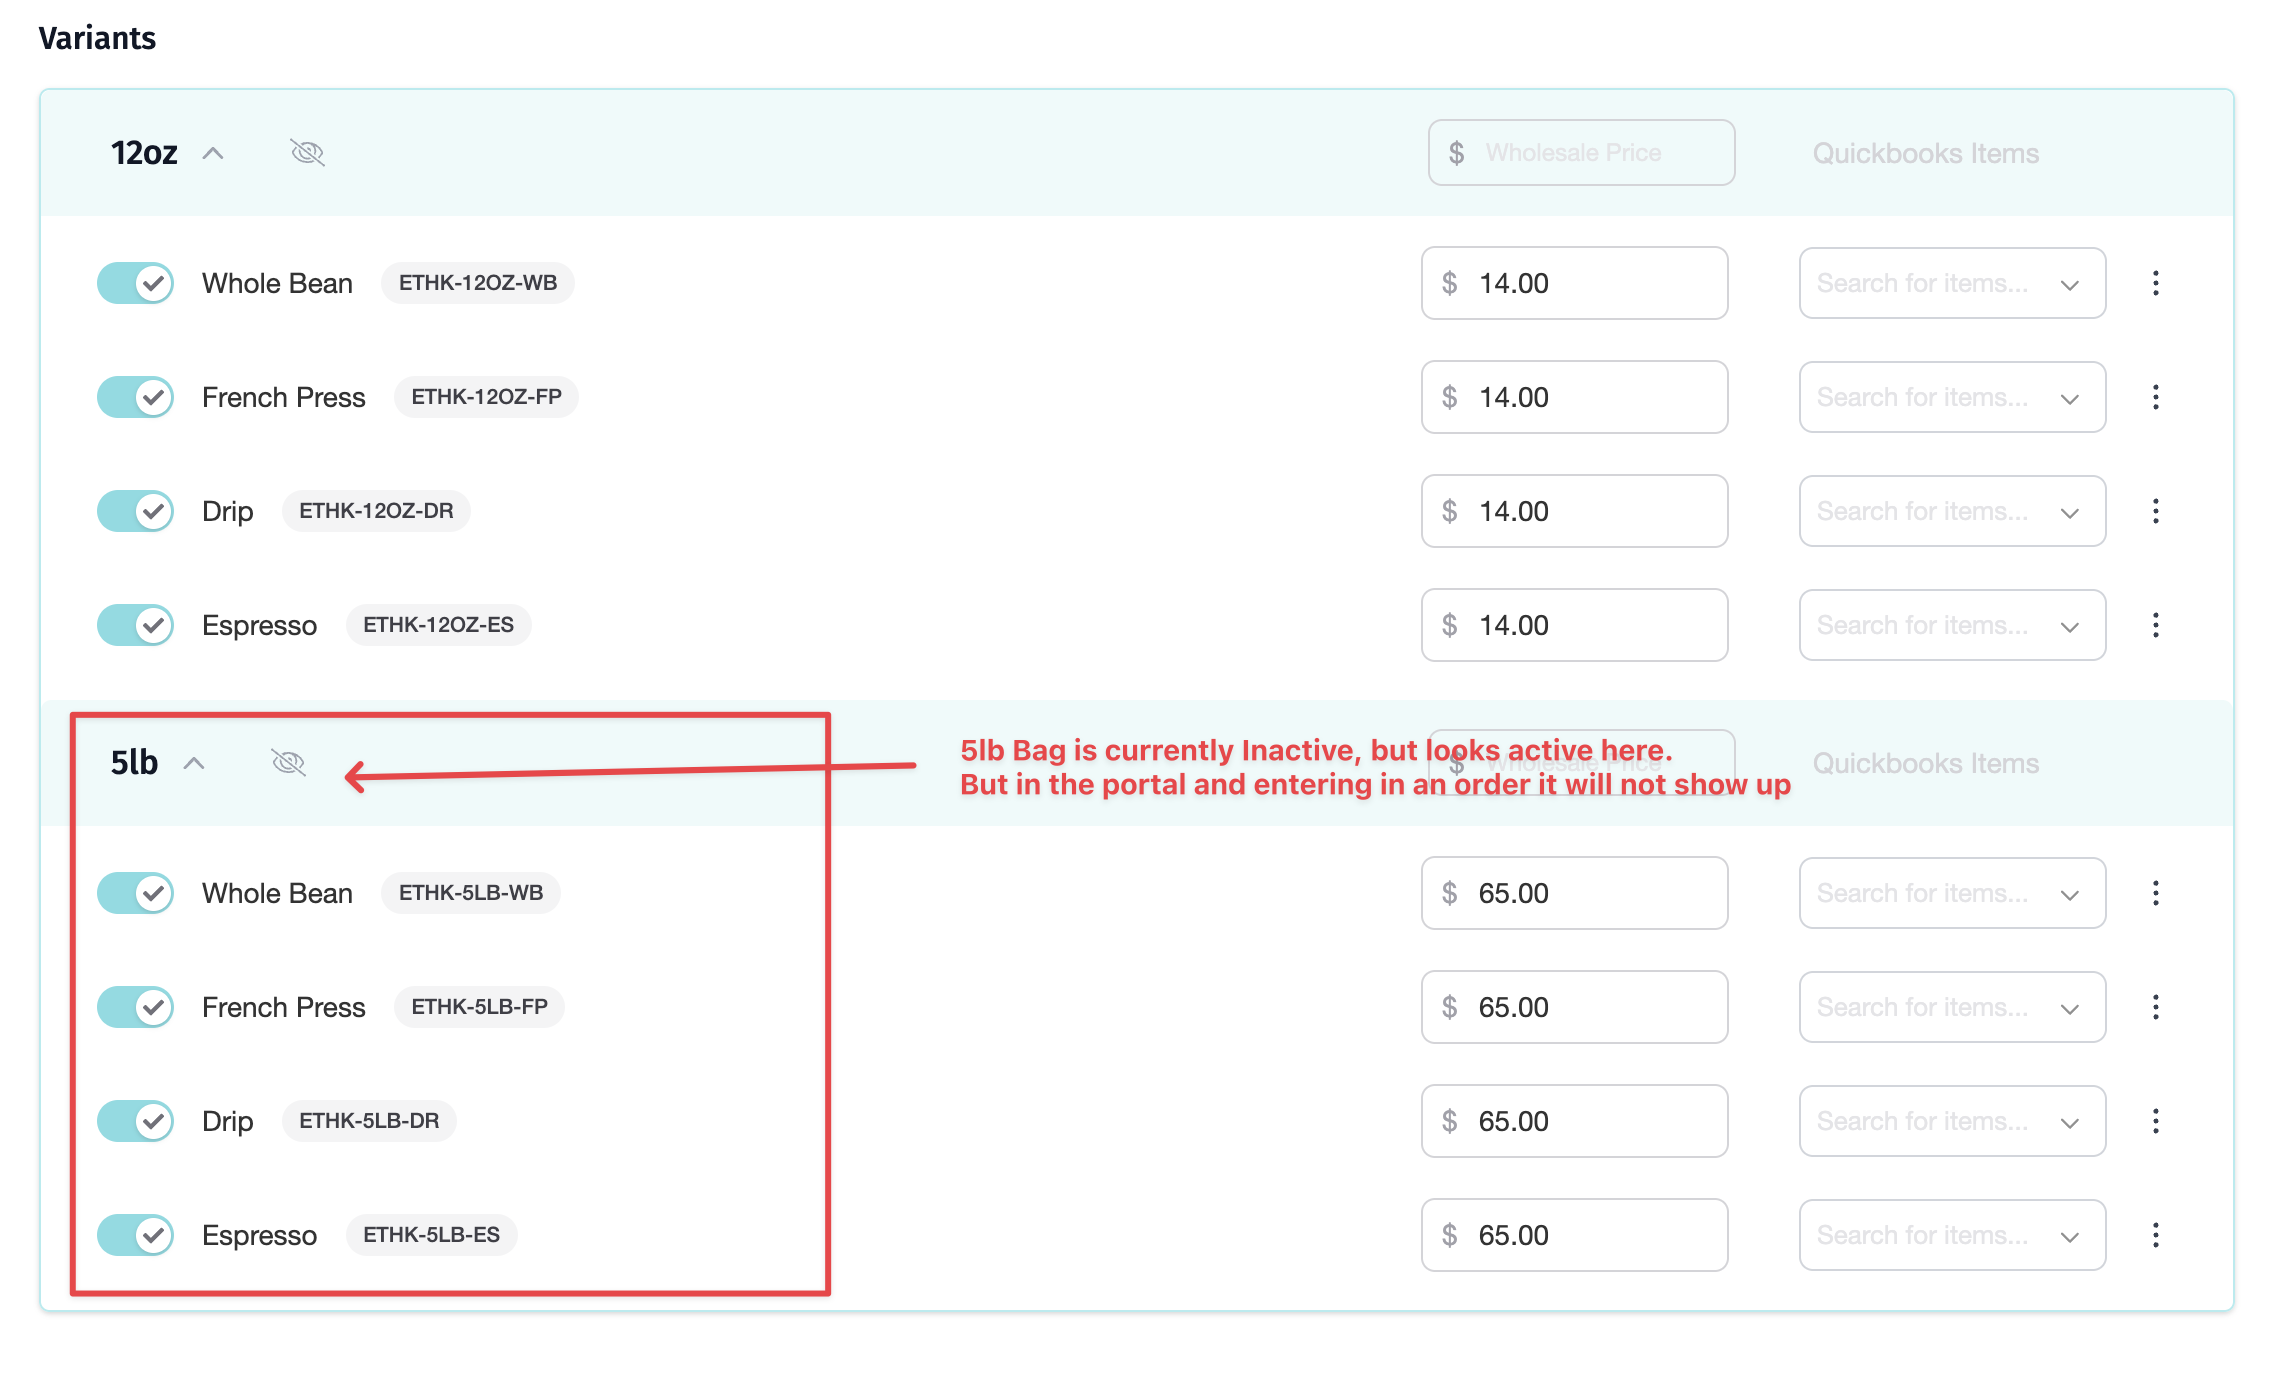
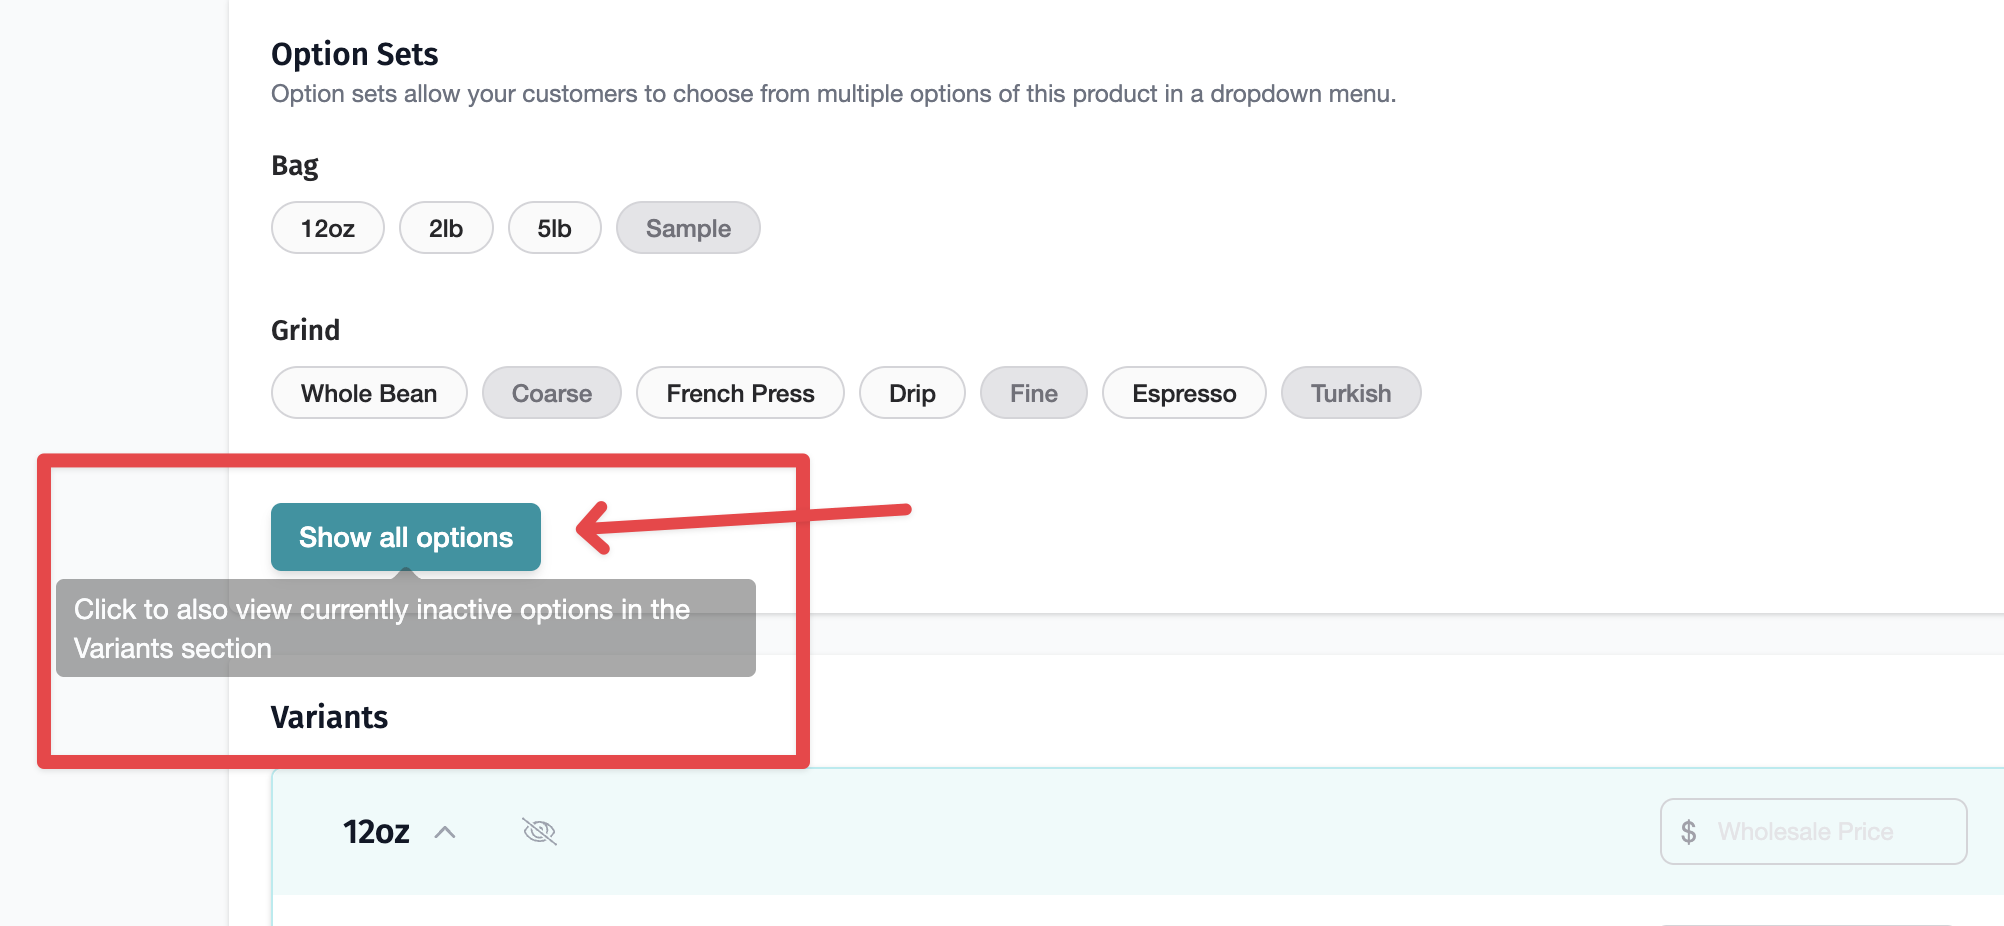
If the new bag isn't visible because it is currently inactive for a product, you can select show options to display the full list of bag options and then active the bag you'd like to add
- Enter in a price for each bag/grind combination
- Click "Update Product" at the bottom of the page

Note: You will also be able to decide if you want to make the bag available on your wholesale portal, or if you would like to make it exclusive to particular customers. To learn more about making products exclusive to customers check out this article.
Creating an Exclusive Bag
You can create bags that are exclusive to one customer or a customer group. When an exclusive bag is active on a product variant, the exclusive bag will only display on that customers' portal and will not be visible to other customers.
A few Examples of when to use this:
- A custom bag is used for a customer (or group) often with a custom blend
- You toll roast or white label roast - you can make those bags exclusive to the customer
- A customer wants to differentiate their product.
- On the bag details screen, check the "Exclusive Bag" checkbox. This will limit the visibility of that specific bag to the customers or customer groups that you specify.

- On the Customers or Customer Groups box section, you can add specific customers or a customer group or both to indicate the exclusivity.
- Click "Save" to finish setting up the exclusive bag.
Once created, the exclusive bag will only be visible to the selected customers you've chosen.
Sort the Order of how Bags are Displayed
You can sort the order of your bags. This will change the order of how they appear in the dropdown on the portal as well as the order of how they appear in the task lists in operations.
-
Click on the "#' header as shown below.

- Drag and drop items in the order
- RoasterTools currently applies this sort preference the display of bag options in the portal, to how they are listed on invoices and to the sorting in of tasks on operations.

FAQs
Q: Does RoasterTools Track inventory of Bags?
A: No, at this time we do not track inventory of Bags or Labels.
Q: Can I delete a Bag?
A: Yes you can Delete a Bag. BUT - know that this will delete the bag has an option on any product. We recommend making a bag Inactive
Q: What happens when a bag is Inactive?
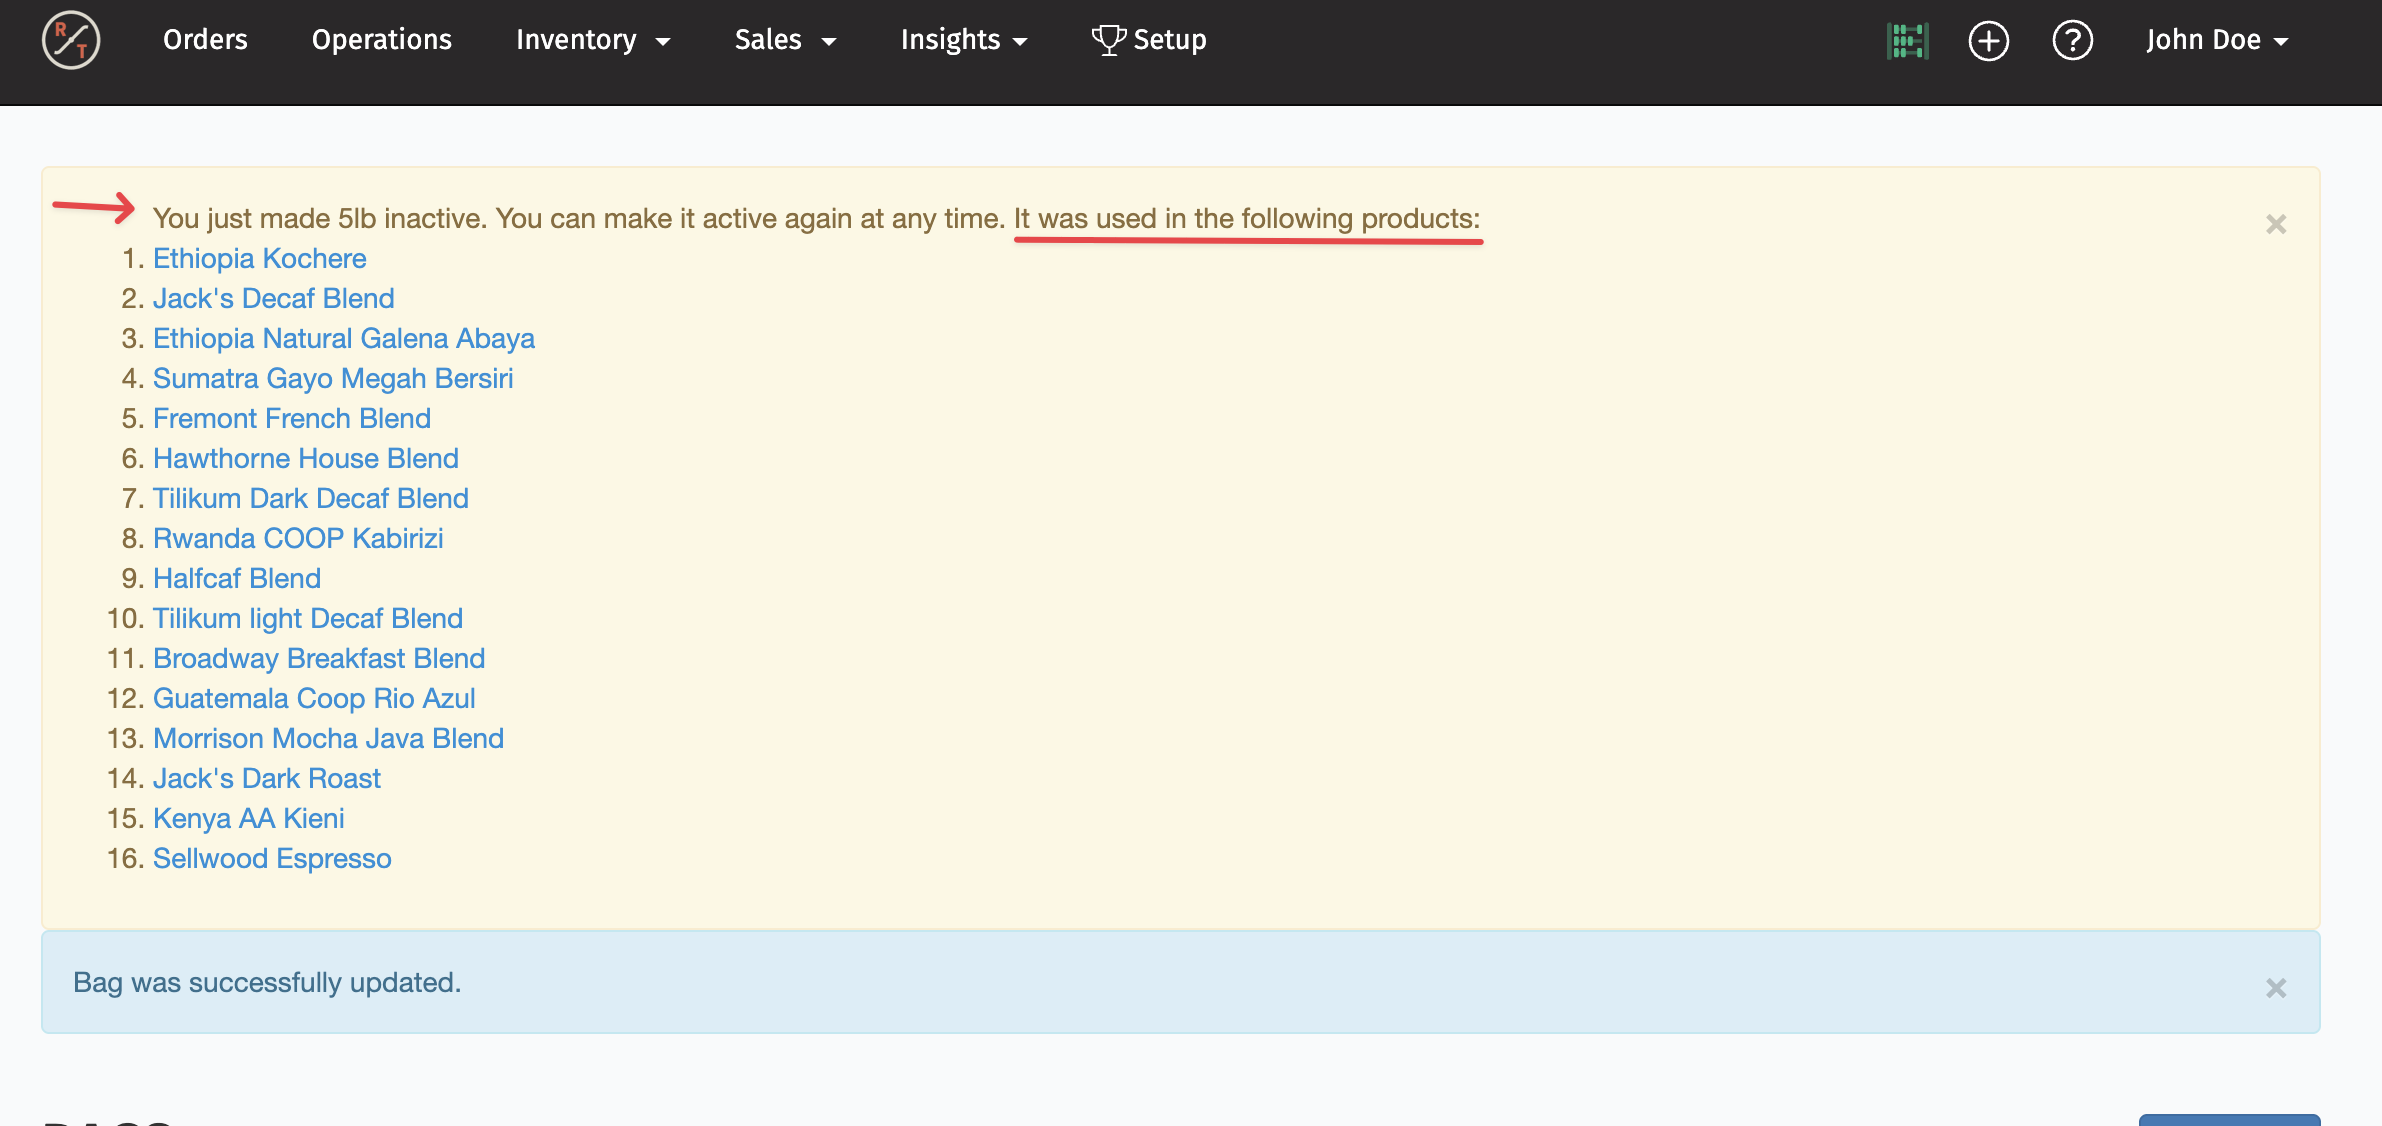
A: When you make a bag Inactive, no variants with that bag can be ordered. This bag will no longer be visible on the portal and manual orders also cannot add that bag variant to an oder.
If there are currently products with the bag variant active, a list will appear for you to know what products will have a bag variant that needs to be deactivated.
NOTE: when you deactivate a Bag, it doesn't automatically deactivate the variants on the products with that bag option. So you will still see it on the variant list, but customer won't see it and orders can't be placed for it